

Google Ads Shopify Conversion Tracking: Complete Setup Guide (2026)
Not sure if your Shopify Google Ads conversion tracking is working correctly? This guide covers everything you need to know. If you’d like an expert to review or set up your tracking, book a free consultation with our team.
Last Update: July 24, 2026
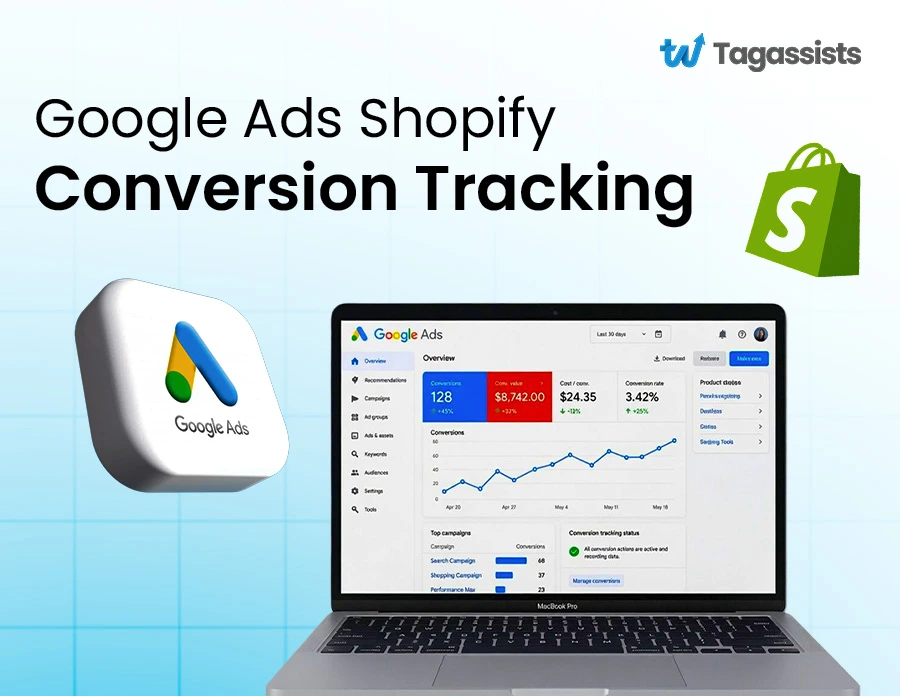
If your Google Ads conversions don’t match your Shopify orders, or your ROAS looks unrealistically high, your conversion tracking is likely broken, duplicated, or incomplete.
For most Shopify stores, the recommended setup is:
- Use the Google & YouTube app for basic Google Ads conversion tracking.
- Add a certified Consent Management Platform (CMP) to support Consent Mode v2.
- If you’re using Google Tag Manager (GTM), disable the native Google Ads pixel to avoid duplicate conversions.
- Compare Shopify orders with Google Ads conversions every week to verify your tracking.
- If you spend $10,000 or more per month on Google Ads, server-side GTM is usually worth the extra setup.
Google Ads conversion tracking on Shopify changed in 2026. Shopify’s checkout now runs in a secure, sandboxed environment, so standard GTM tags can’t run on the order confirmation page. Purchase tracking now requires Shopify Customer Events.
The Google & YouTube app removed the Enhanced Conversions toggle in April 2026. Consent Mode v2 has been required for stores serving customers in the EU and EEA since July 2025. Without it, Enhanced Conversions match rates drop to almost zero. Since June 15, 2026, Google Ads uses ad_storage as the only consent signal for attribution data.
Today, we will cover the available tracking methods, how to set up each one, how to prevent duplicate conversions, how to pass revenue and transaction IDs correctly, how to validate your tracking, and how Smart Bidding uses conversion data to improve performance.
Key Points:
- The Google and YouTube apps do NOT include Consent Mode v2. You must add it separately via a certified CMP plugin.
- Shopify’s native pixel and GTM both fire simultaneously by default, causing duplicate conversions that inflate ROAS by up to 100 percent.
- Shopify’s checkout page is sandbox-isolated. Standard GTM tags cannot fire on the purchase page without the Customer Events API.
- Without a transaction ID, every page reload of the order confirmation page creates a new conversion in Google Ads.
- Server-side tracking recovers 20 to 30 percent more conversions than a client-side setup, giving you more accurate Smart Bidding data.
What Is Google Ads Shopify Conversion Tracking?
Google Ads conversion tracking is how Google knows whether someone who clicked your ad actually bought something from your store. When a customer clicks a Google Ad, lands on your Shopify store, and completes a purchase, a conversion tracking tag fires on the order confirmation page and sends that purchase data back to Google. Google uses this data to tell you what’s working, calculate your ROAS, and power automated bidding strategies like Target ROAS and Maximize Conversion Value.
Without accurate conversion tracking, Smart Bidding is essentially guessing. It needs real purchase signals to learn which keywords, audiences, and ad creatives drive profitable customers. Feed it bad data and it optimizes for bad outcomes. Feed it no data and it can’t optimize at all. If your setup suddenly stops recording conversions or reports empty data, it’s worth checking the common reasons behind Google Analytics showing no data available before making campaign changes.
Why Shopify Stores Need Accurate Conversion Data
Shopify stores face a specific challenge that standalone websites don’t. The checkout process sits on a different domain (checkout.shopify.com), the confirmation page is controlled by Shopify rather than you, and multiple tracking systems can fire simultaneously without you realizing it.
Here’s what inaccurate tracking actually costs you:
- Missing conversions: Smart Bidding doesn’t get enough purchase signals to learn. Campaigns underperform because the algorithm doesn’t know what’s converting.
- Duplicate conversions: Your ROAS looks artificially high. You scale ad spend based on inflated numbers. Actual profitability is lower than reported.
- Incorrect revenue values: Google Ads shows conversion value but the numbers don’t match Shopify. Target ROAS bidding sets bids based on wrong data.
- Broken tracking after updates: Shopify theme updates, app installs, and platform changes break tracking silently. You won’t know until you compare order counts.
How Conversion Data Influences Smart Bidding and Performance Max
Performance Max and Smart Bidding strategies are entirely dependent on the quality of your conversion data. If your purchase events are duplicated, your ROAS target is calibrated against inflated numbers. If transaction values are missing or zero, Target ROAS can’t optimize for value at all. If tracking breaks after a theme update, your campaigns lose their learning data and performance regresses.
For PMax specifically, Google is moving toward POAS (Profit on Ad Spend) as the more accurate optimization metric for 2026. This means passing actual margin data rather than just revenue through your server-side container, so the algorithm bids on profit rather than revenue. We cover this in the server-side tracking section below.
Which Shopify Google Ads Conversion Tracking Method Should You Use?
There are three main ways to set up Google Ads conversion tracking on Shopify. Each has different capabilities, limitations, and ideal use cases. Here’s the honest comparison before we dive into setup guides for each one.
Method | Difficulty | Match Rate | Best For | Key Limitation |
Google & YouTube App | Easy | 60-70% | New stores, small ad budgets under $5k/month | No Consent Mode v2, duplicate risk, no dynamic values post April 2026 |
GTM (Client-side) | Medium | 60-70% | Stores needing custom events and full control | Checkout sandbox blocks standard GTM. Customer Events API required for purchase page. |
Server-side GTM (Stape/GCP) | Advanced | 92-97% | Stores spending $10k+/month on Google Ads | Setup cost $100-$300/month, requires technical implementation |
Why Running Multiple Methods Causes Duplicate Conversions?
Shopify’s Google and YouTube app installs a native Google Ads pixel automatically when you connect it. This pixel fires on the order confirmation page. If you also have a GTM container with a Google Ads conversion tag, both fire on the same page for the same purchase. Google Ads receives two purchase events for one order. Your conversion count doubles. Your ROAS looks twice as good as it actually is.
The fix is straightforward but not obvious: disable the native pixel in Shopify Settings when you switch to GTM tracking. We cover exactly how to do this in the duplicate conversion section below.
Method 1: Setting Up Google Ads Conversion Tracking with the Google & YouTube App
The Google and YouTube app is the fastest way to get purchase tracking running on Shopify. It handles the tagging automatically and connects your store to Google Ads, Merchant Center, and GA4 in one flow. For stores just starting with Google Ads or running modest budgets, it’s the right starting point.
Install and Connect Accounts
- Go to your Shopify admin. Click Apps, then search for Google & YouTube in the App Store.
- Click Install. Follow the permission prompts to connect your Google account.
- On the setup page, link your Google Ads account and your Merchant Center account. If you don’t have a Merchant Center account yet, you’ll be prompted to create one.
- Select your GA4 property from the dropdown. The app will configure the GA4 connection automatically.
- Complete the setup flow. All tracking code is added to your store automatically. You don’t need to touch theme.liquid.
Enable Conversion Tracking
- In the Google and YouTube app, go to the Overview tab.
- Under Conversion tracking, confirm the purchase conversion action is listed as Active.
- In Google Ads, go to Tools > Conversions. Find the purchase conversion action from Shopify. Set it as Primary. This tells Smart Bidding to optimize for this specific action.
- Set any non-purchase conversion actions (add to cart, begin checkout, page views) as Secondary. Secondary conversions inform the algorithm but don’t directly drive bidding.
Enable Enhanced Conversions
April 2026 Change: The Google and YouTube app removed its built-in Enhanced Conversions checkbox in April 2026. The app now only supports client-side Enhanced Conversions with a reduced match rate. For 95 percent or higher match rate, you need a Custom Pixel plus server-side GTM setup, which we cover in Method 3.
If you’re on the app and want to enable Enhanced Conversions at the client-side level, go to your Google Ads account, navigate to Tools > Conversions, select your purchase conversion action, and enable Enhanced Conversions for Web. You’ll need to configure the customer data fields (email, phone) that get hashed and sent alongside each conversion.
Add Consent Mode v2 (Required Separately)
The Google and YouTube app does NOT set up Consent Mode v2. This is one of the biggest gaps in the app setup that almost no guide covers. Consent Mode has been mandatory for EU and EEA stores since July 2025. Without it, Enhanced Conversions fails silently and you lose modeled conversion data for any visitor who declines cookies.
You need to add Consent Mode v2 separately via a certified Consent Management Platform (CMP). Compatible Shopify apps include Cookiebot by Usercentrics, Axeptio, Pandectes, and Consentmo. Install one of these and configure it to output the four required Consent Mode v2 parameters.
Consent Mode Parameter | Controls | Default Before Consent |
ad_storage | Google Ads attribution data (sole control from June 15, 2026) | denied |
analytics_storage | GA4 analytics cookie data | denied |
ad_user_data | Sending customer data to Google for ad targeting | denied |
ad_personalization | Remarketing audiences and personalized ads | denied |
Consent Mode Setup | Match Rate | Modeled Conversions |
Advanced Mode (recommended) | 95-98% | Yes. Recovers over 70% of conversions from users who declined. |
Basic Mode | 60-70% | No. Tags are blocked completely when user declines. |
No Consent Mode (non-compliant for EU) | 40-50% | No. Also violates privacy regulations. |
Verify Tracking Is Working
- Open your store in an incognito window with all extensions disabled.
- Complete a test purchase using a discount code for 100 percent off or a test payment method.
- Go to GA4 > Admin > DebugView. Confirm a purchase event appears with the correct value and transaction ID.
- In Google Ads, go to Tools > Conversions. Within 24 hours you should see the test conversion recorded.
- Compare weekly: Shopify order count vs Google Ads purchase conversions. They should be within 5 to 10 percent of each other.
Pros and Limitations of the App
Pros | Limitations |
No code required. Setup in under 30 minutes. | No dynamic conversion values after April 2026 (hardcoded value only). |
Automatically handles standard purchase events. | No Consent Mode v2 included. Must add separately via CMP. |
Connects GA4, Google Ads, and Merchant Center in one flow. | No server-side tracking. All client-side, meaning 60-70% match rate maximum. |
Good starting point for new advertisers. | No data layer customization. Can’t add custom events without GTM. |
Regularly updated by Shopify. | Native pixel enabled by default, creating duplicate risk if you add GTM later. |
Shopify Checkout Extensibility: What Changed and Why It Matters
This is the section most Google Ads guides skip entirely, and it’s the reason many Shopify tracking setups look correct but silently fail to record purchase events.
What Is Checkout Extensibility?
Shopify introduced Checkout Extensibility as a replacement for the old checkout.liquid customization system. The key change for tracking: the checkout and order confirmation pages are now rendered in a secure sandbox environment. This means standard browser-based JavaScript, including GTM tags, cannot execute on these pages.
The practical consequence: if you set up GTM the traditional way (pasting the container snippet into theme.liquid), your tags will fire correctly on product pages, collection pages, and the cart. But on the checkout and purchase confirmation pages? Nothing fires. Your purchase event never reaches Google Ads.
Why Additional Scripts Are Deprecated
Before Checkout Extensibility, many guides told you to paste tracking code in the Additional Scripts field in Shopify’s checkout settings. This method is deprecated and no longer works reliably for standard Shopify stores. Shopify Plus merchants still have access to checkout.liquid for now, but migration to Checkout Extensibility is required for all Plus stores by a future deadline.
The Shopify Pixel Sandbox Explained
The checkout page on Shopify is pure server-rendered HTML. No custom browser scripts are allowed to execute during checkout for security reasons. This blocks GTM, hardcoded Google Ads tags, and any JavaScript-based tracking from firing on the purchase page.
Shopify’s solution is the Customer Events API, a server-side sandbox that allows approved tracking pixels to receive checkout events after the order completes. This is different from client-side JavaScript. The event data comes from Shopify’s servers rather than from the visitor’s browser.
How to Check Your Store's Migration Status
- Go to Shopify Admin > Settings > Checkout.
- Look for an Upgrade banner or a note about Checkout Extensibility. If you see it, your store is being migrated or is already on the new system.
- Go to Admin > Settings > Customer Events. If this section exists in your settings, Checkout Extensibility is active and you need to use Customer Events for purchase tracking.
Recommended Migration Path
- Go to Shopify Admin > Settings > Customer Events.
- Click Add Custom Pixel.
- Name your pixel Google Ads Purchase Tracking.
- In the pixel code, map the checkout.completed event to your Google Ads purchase conversion tag.
- Save and publish. Test by completing a purchase and verifying the event appears in Google Ads.
Testing Tip: Standard GTM Preview mode does not work on Shopify’s checkout page because of the sandbox. Use the Data Layer Checker Plus Chrome extension instead. Input your GTM container ID and it will show you the data layer on the checkout and confirmation pages where GTM Preview can’t reach.
Method 2: Setting Up Google Ads Conversion Tracking with GTM
GTM gives you full control over what tracking fires, when it fires, and what data it sends. It’s the right choice if you’re running multiple tracking platforms (GA4, Meta, TikTok), need custom event tracking beyond standard purchase events, or want clean separation between your tracking configuration and your theme code.
When GTM Makes Sense
- You’re running Google Ads alongside Meta, TikTok, or other ad platforms and want all tags in one place.
- You need to track custom events like video views, button clicks, outbound link clicks, or form submissions using GTM.
- You want to pass custom revenue values (for example, excluding shipping or applying margin-based values).
- Your store has more than one developer or agency working on it and you want tracking separated from theme code.
Install GTM on Shopify
- Create a GTM account at tagmanager.google.com. Create a new container and select Web as the platform.
- Copy both code snippets GTM gives you. The first goes in the <head> section, the second immediately after the opening <body> tag.
- In Shopify, go to Online Store > Themes. Click the three dots next to your active theme and select Edit Code.
- Find theme.liquid in the file list. Paste the first GTM snippet immediately after the opening <head> tag. Paste the second snippet immediately after the opening <body> tag.
- Save the file. Verify GTM is firing by going to GTM > Preview and entering your store URL.
Data Layer Must Load Before GTM: The data layer initialization must appear before the GTM container script in theme.liquid. If GTM loads first, it misses any data layer events that push before it initializes.
Configure Google Ads Conversion Tracking
- In GTM, go to Tags > New. Select Google Ads Conversion Tracking as the tag type.
- Enter your Conversion ID and Conversion Label. Find these in Google Ads > Tools > Conversions > select your conversion action > Tag Setup.
- Set the Conversion Value to a GTM variable that pulls from the data layer. Do not use a hardcoded value. We cover this in the revenue section below.
- Set Order ID to your transaction ID variable. This is required for deduplication.
- Set the trigger to fire on the Customer Events purchase event (not a standard page view trigger, because of the checkout sandbox).
- Publish your GTM container. Changes in GTM don’t go live until you click Submit and publish a new version.
Pass Revenue Values and Transaction IDs
This is where most GTM setups go wrong. Shopify does not expose a standard data layer with flat variables like transaction_value or transaction_id. You have to extract this data using Custom JavaScript variables in GTM.
For the conversion value, create a Custom JavaScript variable in GTM with this logic:
// Custom JS Variable: Conversion Value function() { return window.checkout?.total_price || dataLayer.find(function(d){ return d.transaction_value; })?.transaction_value || 0; } |
For the transaction ID, which is required to prevent duplicate conversions when a customer reloads the confirmation page:
// Custom JS Variable: Transaction ID function() { return window.checkout?.order_id || window.checkout?.transaction_id || dataLayer.find(function(d){ return d.transaction_id; })?.transaction_id; } |
Why Transaction ID Is Critical?
Without a transaction ID, every time a customer reloads the order confirmation page, Google Ads records a new conversion. A customer who refreshes the page once turns into two conversions. Transaction ID tells Google to deduplicate: if the same ID is received twice, only count it once.
Test and Publish Your Setup
- Use GTM Preview to walk through your store from product page to cart. Confirm your tags fire on the right triggers.
- For the purchase page, use the Data Layer Checker Plus extension to verify the data layer contains your order ID and value.
- Complete a test purchase. Check GA4 DebugView for the purchase event. Check Google Ads for the conversion.
- Compare transaction ID in GA4 vs the order ID in Shopify. They should match exactly.
- Once confirmed, publish your GTM container.
Enhanced Conversions for Shopify Google Ads
Enhanced Conversions improve your match rate by sending hashed first-party customer data alongside each conversion event. When a customer who clicked your ad completes a purchase and is logged into their Google account, Google can match that conversion to the ad click even if the browser cookie was lost due to iOS privacy features, ad blockers, or cross-device sessions.
This matters because browser-based cookie tracking is increasingly unreliable. Safari’s Intelligent Tracking Prevention, iOS 14-plus privacy restrictions, and ad blockers all interfere with standard cookie-based attribution. Enhanced Conversions fills the gap using data the customer already gave you: their email address, phone number, and name.
How Enhanced Conversions Work on Shopify
When a customer completes a purchase, your tracking tag hashes their email address and phone number using SHA-256 encryption before sending it to Google. Google compares this hashed data to its own records of users who clicked your ads. If there’s a match, the conversion is attributed correctly even without a browser cookie.
Method | Match Rate | Notes |
Client-side Enhanced Conversions (app or GTM) | 60-70% | Affected by ad blockers, iOS restrictions, and browser privacy. Lower accuracy. |
Server-side Enhanced Conversions (sGTM) | 92-96% | Bypasses browser restrictions. Data sent from server before response reaches browser. |
Client + Server Combined | 95-98% | Best accuracy. Client-side as primary, server-side as fallback for blocked sessions. |
Setting Up Enhanced Conversions via GTM
- In GTM, go to your Google Ads Conversion Tracking tag.
- Under Enhanced Conversions, enable the option and select User-Provided Data.
- Create a User-Provided Data variable that maps to the customer’s email and phone from the data layer or checkout object.
- The email and phone are automatically hashed by the Google tag before being sent. You don’t need to hash them manually for client-side setup.
For server-side Enhanced Conversions, the hashing must happen in the server container before the data is forwarded to Google:
// Server-side GTM: Enhanced Conversions payload gtag(‘event’, ‘purchase’, { ‘transaction_id’: checkout.order_id, ‘value’: checkout.total_price, ‘currency’: checkout.currency, ‘enhanced_conversions’: { ’email’: sha256(customer.email), ‘phone’: sha256(customer.phone) } }); |
Passing Revenue and Order Values Correctly in Shopify
Conversion value is the number that powers Target ROAS bidding. If it’s wrong, zero, or missing, your Smart Bidding strategy is optimizing blindly. This section covers why revenue values go wrong and how to fix them.
Why Accurate Revenue Tracking Matters for ROAS Bidding
Target ROAS works by predicting the conversion value of each auction based on historical data. If your conversion values are inflated because of duplicate tracking, your ROAS target is miscalibrated. If your values show zero because the variable isn’t mapping correctly, Target ROAS has nothing to optimize toward and defaults to a generic volume strategy.
Common Reasons Conversion Values Are Incorrect
- Hardcoded value: The Google Ads tag sends a fixed number (like 1.00) instead of pulling the actual order value from the data layer.
- Wrong Shopify variable: Shopify stores order values in checkout.total_price (in cents, not dollars for some regions). Using the wrong variable sends incorrect amounts.
- Missing currency: Without a currency parameter, Google Ads defaults to your account currency and may apply incorrect conversion rates for multi-currency stores.
- Subtotal vs total: Some setups pass the product subtotal instead of the total order value including shipping and tax, understating actual revenue.
The Importance of Transaction IDs
Set a unique transaction ID for every purchase conversion. Use the Shopify order ID, which is always unique. Map it in GTM using a Custom JavaScript variable as shown in the GTM setup section above.
With a correct transaction ID, if Google Ads receives the same purchase event twice (from a duplicate tag or page reload), it counts only one conversion. Without it, every duplicate event is counted as a new purchase.
How to Verify Conversion Values Are Being Passed Correctly
- In Google Ads, go to Tools > Conversions. Click on your purchase conversion action.
- Look at the Conversion value column in your recent campaign data. Check a specific date range where you know the exact Shopify revenue.
- Compare: Shopify revenue for that period vs Google Ads conversion value for the same period. They won’t match exactly due to attribution differences, but should be within 10 to 15 percent.
- If Google Ads shows zero conversion value, your revenue variable is not mapping correctly. Return to GTM and test the Custom JavaScript variable in Preview mode. If conversions aren’t being recorded at all, work through these common Google Ads conversion tracking issues before changing your campaigns.
The Duplicate Conversion Problem: Why Your ROAS May Be Wrong
Duplicate conversions are the most common hidden problem in Shopify Google Ads setups. They inflate conversion counts, distort ROAS, and cause Smart Bidding to make decisions based on data that doesn’t reflect reality. If you’re also seeing duplicate purchase events in GA4, fix those first before troubleshooting Google Ads.
What Causes Duplicate Conversions
Cause | How It Happens | How to Detect |
Native pixel + GTM both active | Google and YouTube app installs native pixel. GTM tag also fires. Both record the same purchase. | GTM Preview shows purchase tag firing. Native pixel also fires. Two purchase events per order in GA4 DebugView. |
Customer reloads confirmation page | Without transaction ID, every page reload creates a new conversion. | GA4 shows multiple purchase events with same order details but no transaction ID. |
Thank-you page redirect loops | Some payment processors redirect back to confirmation page, triggering tag twice. | Two purchase events in rapid succession in DebugView with identical order values. |
Manual tag + app tracking | Hardcoded Google Ads tag in theme.liquid plus app-installed pixel both fire. | More than one Google Ads conversion tag visible in Tag Assistant on confirmation page. |
How to Remove Duplicate Tracking
- First, identify what’s firing. Install the Google Tag Assistant Chrome extension and navigate to your order confirmation page after a test purchase. It lists every tag that fired.
- If you’re using GTM, check whether the native Shopify pixel is also active. Go to Shopify Admin > Settings > Customer Events. Look for any Google Ads pixels you didn’t create.
- Disable the native pixel: go to Shopify Admin > Apps > Google and YouTube app > Settings. Find the conversion tracking setting and disable the automatic pixel if you’re managing tracking via GTM.
- If you have a hardcoded tag in theme. liquid and a GTM tag, remove one. Choose which source you want to be authoritative and remove the other completely.
- Re-test. Complete a test purchase and verify that only one purchase event appears in DebugView and one conversion in Google Ads.
Conversion Tracking for Google Shopping and Performance Max Campaigns
Performance Max is Google’s fully automated campaign type that runs across all Google inventory. It uses conversion data more heavily than any other campaign type. Bad conversion data in a standard Search campaign is a problem. Bad conversion data in PMax can systematically destroy your budget.
Primary vs Secondary Conversion Actions
This is a setting many Shopify stores get wrong. In Google Ads, every conversion action is either Primary or Secondary. Primary conversions directly inform Smart Bidding. Secondary conversions record data but don’t drive bidding.
Conversion Action | Setting | Why |
Purchase | Primary | This is the revenue event. Smart Bidding must optimize for this. |
Add to Cart | Secondary | If set as primary, bidding optimizes for cart adds, not purchases. ROAS tanks. |
Begin Checkout | Secondary | Same issue. Lots of checkout initiations that don’t convert will mislead bidding. |
Page View | Secondary (or off) | Never set page views as primary. Every visitor counts as a conversion. |
Sign Up / Lead | Primary only if no purchase data yet | Use as primary only for lead gen stores. Switch to purchase once you have data. |
To change conversion action settings:
go to Google Ads > Tools
- Conversions
- Select the action
- Edit
- Goal and Action Optimization
- Select Primary or Secondary.
Why Dynamic Conversion Values Matter for Target ROAS
Performance Max with Target ROAS needs accurate per-transaction conversion values to function correctly. It uses these values to predict the expected revenue from each auction and bid accordingly. A flat hardcoded value means PMax treats a $15 order and a $500 order identically, which makes value-based bidding impossible.
Always pass the actual order value using a dynamic variable, not a fixed number. If you’re running the Google and YouTube app and it’s sending hardcoded values post April 2026, this is a strong reason to migrate to GTM or server-side tracking for full control over conversion value mapping.
POAS: The 2026 PMax Optimization Shift
Forward-thinking advertisers are shifting from ROAS (Revenue on Ad Spend) to POAS (Profit on Ad Spend) for PMax campaign management in 2026. The difference is significant: ROAS treats a $500 order with a 10 percent margin the same as a $500 order with a 50 percent margin. POAS accounts for your actual cost of goods.
// POAS formula POAS = (Revenue – Cost of Goods – Ad Spend) / Ad Spend
// Example: // Revenue: $500, COGS: $200, Ad Spend: $50 // POAS = (500 – 200 – 50) / 50 = 5.0 // Meaning: $5 profit for every $1 spent on ads |
To implement POAS, pass margin-based conversion values through your server-side container instead of gross revenue. This requires knowing your product margins and mapping them to the data layer. Stape’s POAS Data Feed is one option for automating this. The result is PMax bidding on profit rather than revenue, which typically improves actual business outcomes by 20 to 30 percent even if ROAS appears lower.
Method 3: Server-Side Tracking for Shopify Google Ads
Server-side tracking is the highest-accuracy setup available for Shopify stores. Instead of relying on browser-based JavaScript tags that can be blocked by ad blockers, iOS privacy features, or Shopify’s checkout sandbox, server-side tracking sends conversion data directly from a cloud server to Google. The visitor’s browser is no longer the data path.
For stores spending $10,000 or more per month on Google Ads, the improvement in match rate (from 60 to 70 percent up to 92 to 97 percent) justifies the setup cost easily. The additional 20 to 30 percent of recovered conversions means Smart Bidding gets more accurate training data, which compounds into better campaign performance over time.
Stape vs Self-Hosted: Which Is Right for Your Store?
Provider | Monthly Cost | Match Rate | Setup Complexity | Best For |
Stape | $100-$300 | 92-96% | Low. Pre-built Shopify templates, no DevOps. | Stores with $20k-$500k/month revenue wanting managed infrastructure. |
Self-Hosted (GCP/AWS) | $50-$150 | 94-97% | High. Requires DevOps or developer. | Stores with $100k+/month revenue with in-house technical resource. |
Client-side only | $0 | 60-70% | Low. | Starter stores under $5k/month ad spend. Acceptable floor, not best practice. |
Server-Side GTM Migration Checklist
- Set up a server GTM container in Google Tag Manager. Copy the container configuration.
- Create a Step account (or configure your GCP/AWS server) and host the server container.
- Install the Stape Conversion Tracking app from Shopify’s App Store if using Stape. Activate it in Online Store > Themes > Customize > App Embeds.
- In your client-side GTM container, set up GA4 events and configure them to also send to the server container endpoint.
- In the server container, configure the Google Ads Conversion Tracking tag to receive events from the client container and forward them to Google.
- Set up deduplication logic in the server container to prevent double-counting between client and server events.
- Test using DebugView in both the client and server containers simultaneously.
- Once confirmed, disable the client-side Google Ads tag to avoid duplication. Server container becomes the authoritative source.
How to Validate Your Shopify Google Ads Conversion Tracking
Setting up tracking is step one. Validating it actually works is step two, and it’s the step most stores skip. A tracking setup that looks active but sends wrong data is worse than no tracking at all, because it produces confident but incorrect conclusions.
Place a Test Order
- Create a 100 percent discount code in Shopify. Apply it to a test product worth more than $0 so the order value tests correctly.
- Open your store in incognito mode with all browser extensions disabled.
- Complete the purchase using your discount code.
- Note the order ID from the Shopify confirmation page and from Shopify Admin.
Check Google Ads Conversion Diagnostics
- In Google Ads, go to Tools > Conversions. Check the Status column for your purchase conversion action. It should show Recording conversions.
- Under Conversion diagnostics, look for any warnings about missing tags, invalid transaction IDs, or zero conversion value.
- If using Tag Assistant, it shows real-time confirmation when a conversion tag fires correctly on the confirmation page.
Verify Purchase Events in GA4
- Go to GA4 > Admin > DebugView immediately after your test purchase.
- Confirm a purchase event appears. If purchase events aren’t appearing in DebugView or standard reports, troubleshoot GA4 events not showing up in reports before investigating Google Ads. Click it and verify it contains: transaction_id (matching your Shopify order ID), value (matching the test order amount), currency.
- Confirm only one purchase event fired. If you see two, you have a duplicate tracking problem.
Compare Shopify Orders vs Google Ads Data
This is the most important ongoing check. Every week, compare:
- Shopify orders (Admin > Orders, filtered by the same date range)
- Google Ads purchase conversions (for the same date range, same attribution window)
- GA4 purchase events (Admin > Reports > Engagement > Events)
These numbers will never be identical because of different attribution models and session definitions. But they should be within 5 to 10 percent of each other. A gap larger than 10 percent almost always indicates duplicate tracking, missing purchase events, or attribution configuration issues.
Ongoing Tracking Health Checks
Problem | Likely Cause | Solution |
No conversions recorded | Tag not firing or checkout sandbox blocking tag | Check Customer Events API setup. Verify GTM container is published. |
Double conversions (2x Shopify orders) | Native pixel + GTM both active | Disable native pixel in Shopify app settings. Use transaction ID. |
Wrong revenue values (too high or too low) | Wrong data layer variable or hardcoded value | Fix Custom JavaScript variable in GTM. Test in Preview mode. |
Missing purchases (GA4 vs Shopify gap) | Attribution window or consent blocking conversions | Check Consent Mode v2 setup. Compare attribution windows. |
Zero conversion value | Variable not mapping correctly from data layer | Test Custom JS variable in GTM Preview. Verify checkout object access. |
Conversions stop after theme update | Theme update removed GTM snippet or data layer push | Re-verify theme.liquid after every theme update. |
Common Google Ads Shopify Conversion Tracking Mistakes
These are the mistakes we see most often when auditing Shopify tracking setups. Each one either inflates conversions, deflates them, or breaks them silently.
Mistake | Impact | Fix |
Running app + GTM + manual tag simultaneously | Triple counting. ROAS looks 3x too high. | Pick one method. Disable all others completely. |
Not disabling native pixel when switching to GTM | Double conversions. Every sale counted twice. | Shopify Admin > Customer Events > remove app-installed pixel. |
Forgetting to publish GTM container | New tags and changes never go live. Looks correct in GTM but doesn’t fire. | Always click Submit after making GTM changes. |
Testing with an ad blocker enabled | Tests fail for tracking problems that don’t actually exist. | Always test in incognito with all extensions off. |
Setting add-to-cart as a Primary conversion | Smart Bidding optimizes for cart adds, not purchases. ROAS collapses. | Set only purchase as Primary. All others to Secondary. |
Skipping transaction ID setup | Every confirmation page reload creates a new conversion. | Always pass order_id as transaction ID in Google Ads tag. |
Ignoring Consent Mode v2 for EU traffic | Enhanced Conversions silent failure. 40-60% match rate drop. | Install certified CMP. Configure all four Consent Mode parameters. |
Using hardcoded conversion value | Target ROAS bidding calibrated incorrectly. PMax can’t optimize by value. | Use Custom JS variable pulling actual order value from checkout object. |
Assuming tracking still works after theme update | Theme updates commonly remove GTM snippet or break data layer. | Re-verify tracking after every Shopify theme update. |
Not checking for duplicate events after setup changes | Silent inflation of conversion data that compounds over time. | Compare Shopify order count vs GA4 purchase events weekly. |
What Changed in 2026: Shopify Conversion Tracking Timeline
Several significant changes in 2026 have made older setup guides unreliable. Here’s what you need to know:
Change | Date | Impact on Your Setup |
Consent Mode v2 mandatory for EU/EEA | July 2025 (enforcement ongoing) | Without it, Enhanced Conversions fails silently. Must add via certified CMP. |
Google and YouTube app removes Enhanced Conversions toggle | April 2026 | Client-side Enhanced Conversions no longer one-click. Requires Custom Pixel or server-side. |
Google Signals no longer controls Ads data | June 15, 2026 | ad_storage is now sole control for Google Ads attribution. Update Consent Mode immediately. |
Shopify Checkout Extensibility fully live | 2026 rollout | Standard GTM tags cannot fire on checkout/confirmation page. Customer Events API required. |
PMax POAS shift gaining adoption | 2026 | Profit-based conversion values becoming standard for serious PMax advertisers. |
How Tagassists Helps Shopify Stores Get Accurate Google Ads Conversion Tracking
Stop Missing Shopify
Conversions
We help you track every sale and customer action with a reliable Google Ads setup.
When Shopify stores come to us with conversion tracking problems, they usually fall into one of three situations.
- Their Google Ads conversions are 2x their Shopify orders. The native pixel and GTM have both been running for months without anyone realizing. Every campaign decision has been based on inflated data.
- Their tracking looks correct but purchase events show zero conversion value. Smart Bidding has been running on volume targets instead of ROAS because there’s no revenue signal to optimize against.
- Tracking stopped after a theme update six weeks ago. They noticed because ROAS dropped sharply but couldn’t work out why.
Here’s what we do at Tagassists when we audit a Shopify Google Ads tracking setup:
- Conversion source audit: We identify every pixel, tag, and app that is currently sending conversion data to Google Ads and map out the duplication risk.
- GTM container review: We check every tag, trigger, and variable. We confirm the container is published, the data layer pushes before GTM loads, and the purchase tag fires only once per order.
- Revenue and transaction ID verification: We confirm conversion values match Shopify order values and that every purchase event carries a unique transaction ID for deduplication.
- Consent Mode v2 check: We verify all four parameters are correctly implemented in Advanced Mode and that the June 2026 ad_storage requirement is met.
- Customer Events API review: We confirm the purchase event is configured correctly for Shopify’s checkout sandbox and that it fires reliably on the confirmation page.
- Weekly data reconciliation setup: We build a simple comparison view in Looker Studio showing Shopify orders vs Google Ads conversions vs GA4 purchase events so you can catch any future tracking breaks immediately.
If you’re not confident your Shopify conversion tracking is accurate right now, a tracking audit will show you exactly what’s firing, what’s duplicated, and what’s missing. Get in touch with Tagassists to book yours.
Conclusion
Accurate Google Ads conversion tracking on Shopify in 2026 requires more than installing an app and moving on. It requires understanding which tracking method fits your store’s needs, actively preventing the duplicate conversion problem, configuring Consent Mode v2 separately from your tracking setup, and adapting to Shopify’s checkout sandbox with the Customer Events API.
Validate your tracking before you scale ad spend. Compare Shopify orders against Google Ads conversions every week. Any gap larger than 10 percent is a sign something needs investigating. The time you spend on tracking accuracy pays back many times over in better campaign decisions and more accurate ROAS measurement.
Frequently Asked Questions
How do I add Google Ads conversion tracking to Shopify?
The simplest method is installing the Google and YouTube app from the Shopify App Store and connecting it to your Google Ads account. This handles tagging automatically. For more control over tracking data and revenue values, use Google Tag Manager installed in theme.liquid. For stores spending over $10,000 per month on ads, server-side GTM via Stape or a self-hosted container gives the highest accuracy.
What is the best conversion tracking method for Shopify?
For most stores starting out: the Google and YouTube app with a separate Consent Mode v2 CMP. For stores with custom tracking needs or multiple ad platforms: GTM with Customer Events API for checkout tracking. For high-spend stores: server-side GTM. Never run multiple methods simultaneously without disabling the duplicates first.
Why are my Google Ads conversions higher than my Shopify orders?
This is almost always caused by duplicate tracking. The two most common causes are the native Shopify Google Ads pixel and a GTM tag both firing on the same confirmation page, or a customer reloading the confirmation page triggering the conversion tag multiple times because no transaction ID is set. Check Tag Assistant on your confirmation page to see how many tags fire per purchase.
Why is Shopify not recording Google Ads conversions?
Since Shopify introduced Checkout Extensibility, standard GTM tags cannot fire on the checkout or order confirmation page due to the sandbox environment. You need to set up conversion tracking via Shopify’s Customer Events API instead of relying on a standard GTM page view trigger. Also check that your GTM container is published (not just saved in draft) and that the correct Measurement ID is in use.
Can I use GTM and the Google & YouTube App together?
Not for the same conversion action without causing duplicates. If you switch to GTM for Google Ads tracking, disable the native conversion pixel in the Google and YouTube app first. You can keep the app installed for its Merchant Center and product feed functionality, just not for conversion tracking. Only one source should send purchase events to Google Ads.
Does Shopify support enhanced conversions?
Yes, but with important caveats in 2026. The Google and YouTube app removed its one-click Enhanced Conversions toggle in April 2026. You now need to set up Enhanced Conversions manually via GTM or via a server-side container. Enhanced Conversions also requires Consent Mode v2 in Advanced Mode to function correctly. Without it, the match rate drops significantly and conversions may fail to send silently.
Why is my conversion value showing $0?
Your conversion tag is either using a hardcoded zero value or the Custom JavaScript variable pulling the order value isn’t mapping correctly from Shopify’s checkout object. In GTM Preview mode, check what value your conversion value variable returns on the confirmation page. Shopify’s order value is typically found at window.checkout.total_price. Make sure your variable is reading from the right location.
How long does Google Ads conversion tracking take to work?
Google Ads conversion tags fire in real time when the event occurs. The conversion should appear in your Google Ads account within a few hours of the test purchase, sometimes within minutes. Standard reports update with up to a 24-hour delay. If you don’t see a conversion after 24 hours following a confirmed test purchase, there’s a setup problem to diagnose.
What is a transaction ID, and why is it important?
A transaction ID is a unique identifier for each order, typically your Shopify order number. You pass it in the Google Ads conversion tag alongside the purchase event. If Google Ads receives the same conversion tag twice with the same transaction ID, it counts only one conversion. Without a transaction ID, every duplicate tag fire creates a new conversion record. It’s the primary defense against inflated conversion counts from page reloads and duplicate tags.
How do I verify Shopify conversion tracking is working?
Place a test order using a 100 percent discount code in an incognito window with extensions disabled. Check GA4 DebugView for the purchase event with the correct value and transaction ID. Check Google Ads Conversion Diagnostics for any warnings. Then compare weekly: Shopify order count vs Google Ads purchase conversions should be within 5 to 10 percent. Use Tag Assistant to confirm that only one purchase tag fires per order.
Can Performance Max campaigns run without purchase tracking?
Technically, yes, but you won’t get meaningful results. Performance Max without purchase conversion data defaults to general optimization with no value signals. Smart Bidding has no basis for the Target ROAS strategy. The algorithm can’t learn which audiences and placements drive profitable customers. If you’re running PMax without accurate purchase tracking, you’re essentially running a broad awareness campaign with no feedback loop.
What happens if conversion tracking is inaccurate?
Inaccurate tracking causes Smart Bidding to optimize for the wrong signals. If conversions are doubled, your ROAS target is calibrated against inflated numbers and you’ll underbid on real opportunities. If conversions are missing, Smart Bidding enters a learning phase or exits the learning phase with insufficient data, causing performance regression. If conversion values are zero, Target ROAS can’t function at all. The impact compounds over time because today’s bad data trains tomorrow’s worse bidding decisions.

Abdullah Al Zahid
Abdullah Al Zahid is the CEO & Founder of tagassists and a media buying specialist with over 4 years of experience. He has managed more than $7.5M in advertising spend, helping businesses grow through effective digital marketing, web analytics, and tracking solutions.